Getting Started with Web Security - Console
 Updated 3 hours ago
by
admin
Updated 3 hours ago
by
admin
Follow this guide to set up Web Security in the TrustLayer console. Sign in at console.clouduss.com to get started. Each step has a short animated walkthrough and a link to the full article.
1. Add administrators
- Click Administrators in the left-hand menu (under Settings) and click Add.
- Enter the Full name, Email address and Role.
- Click Add user. The new administrator is emailed a link to activate their account.
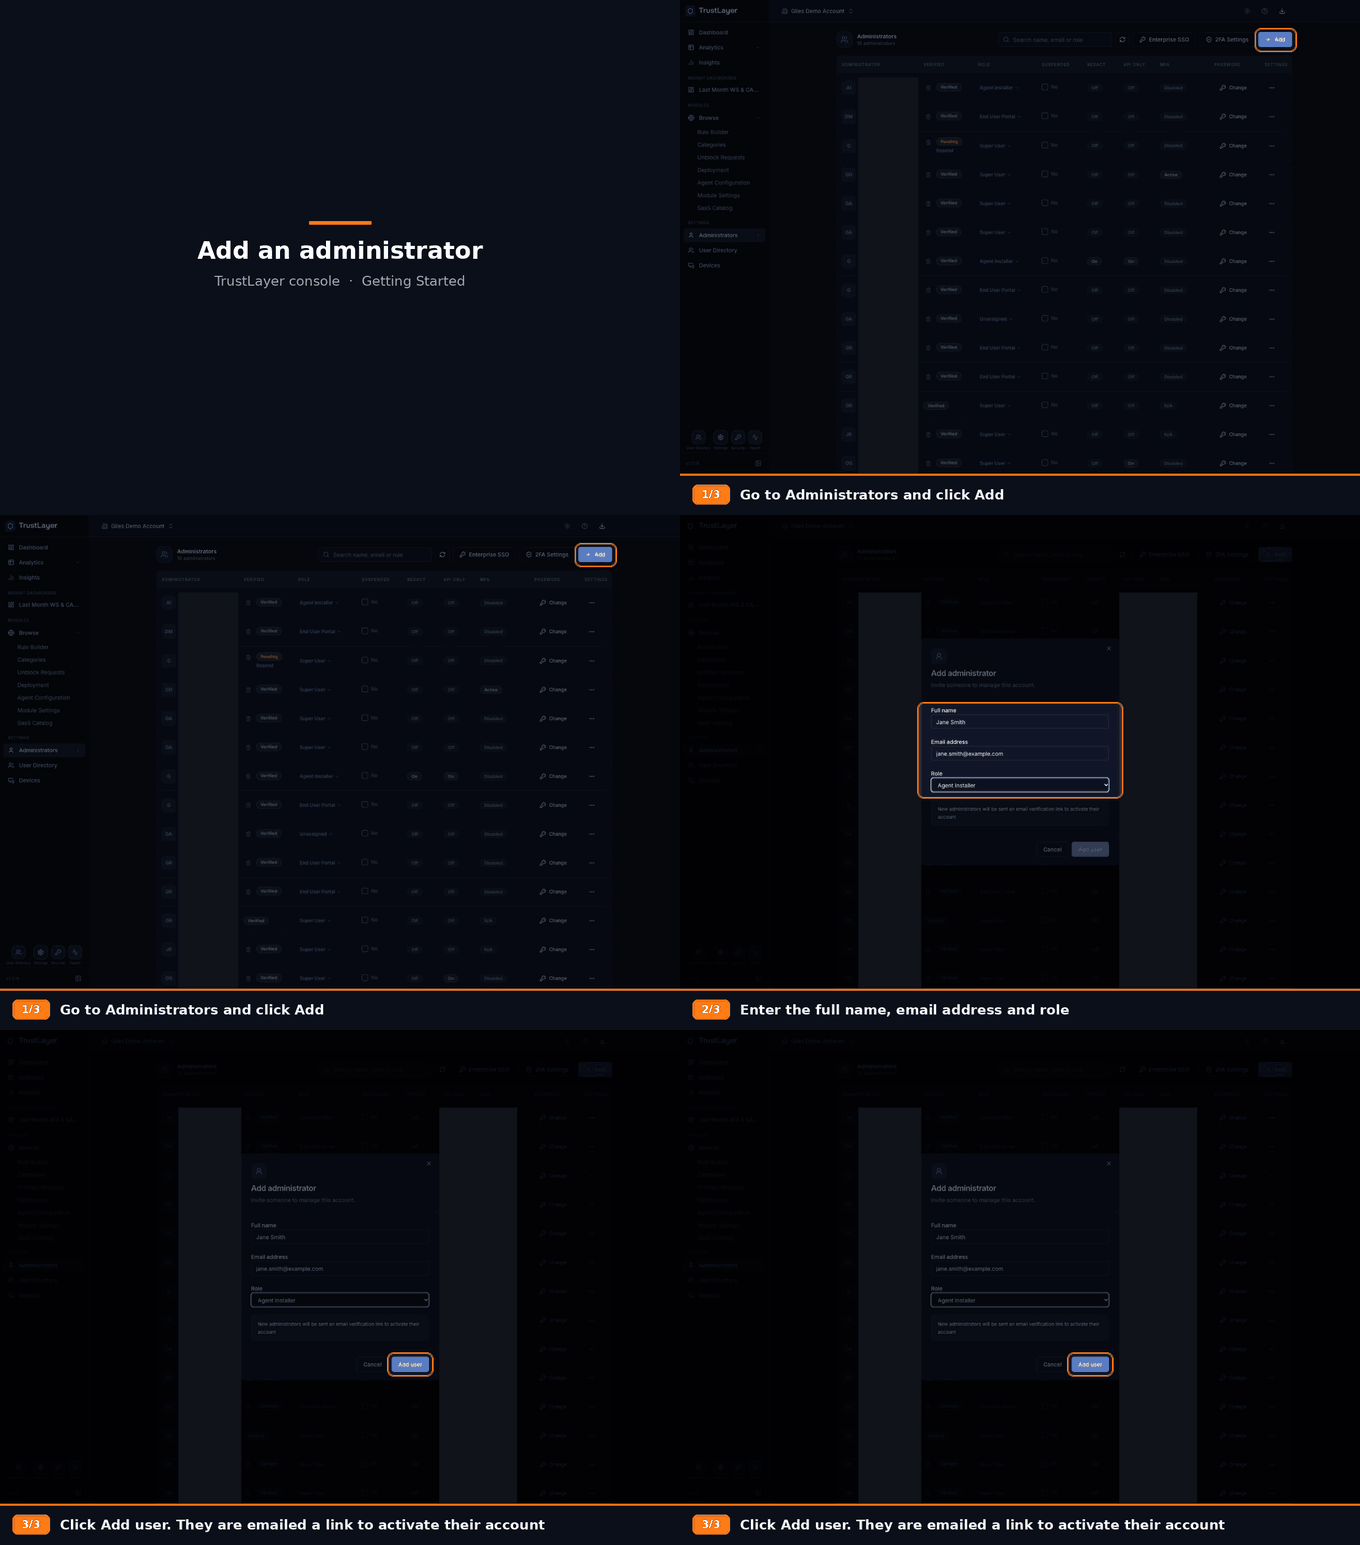
For details of each role, see Roles. For more about managing administrators, see Administrators.
2. Connect Microsoft Entra ID
Connecting Microsoft Entra ID lets you use your Entra ID users and groups in rules.
- Click User Directory in the left-hand menu.
- Click the arrow next to Add and choose Microsoft Entra ID.
- Enter a Directory name and your Microsoft tenant domain (usually ending in
onmicrosoft.com). - Optionally, under Synchronization scope, limit which users and groups are imported.
- Click Create directory. A Microsoft administrator will need to approve read access to your directory.
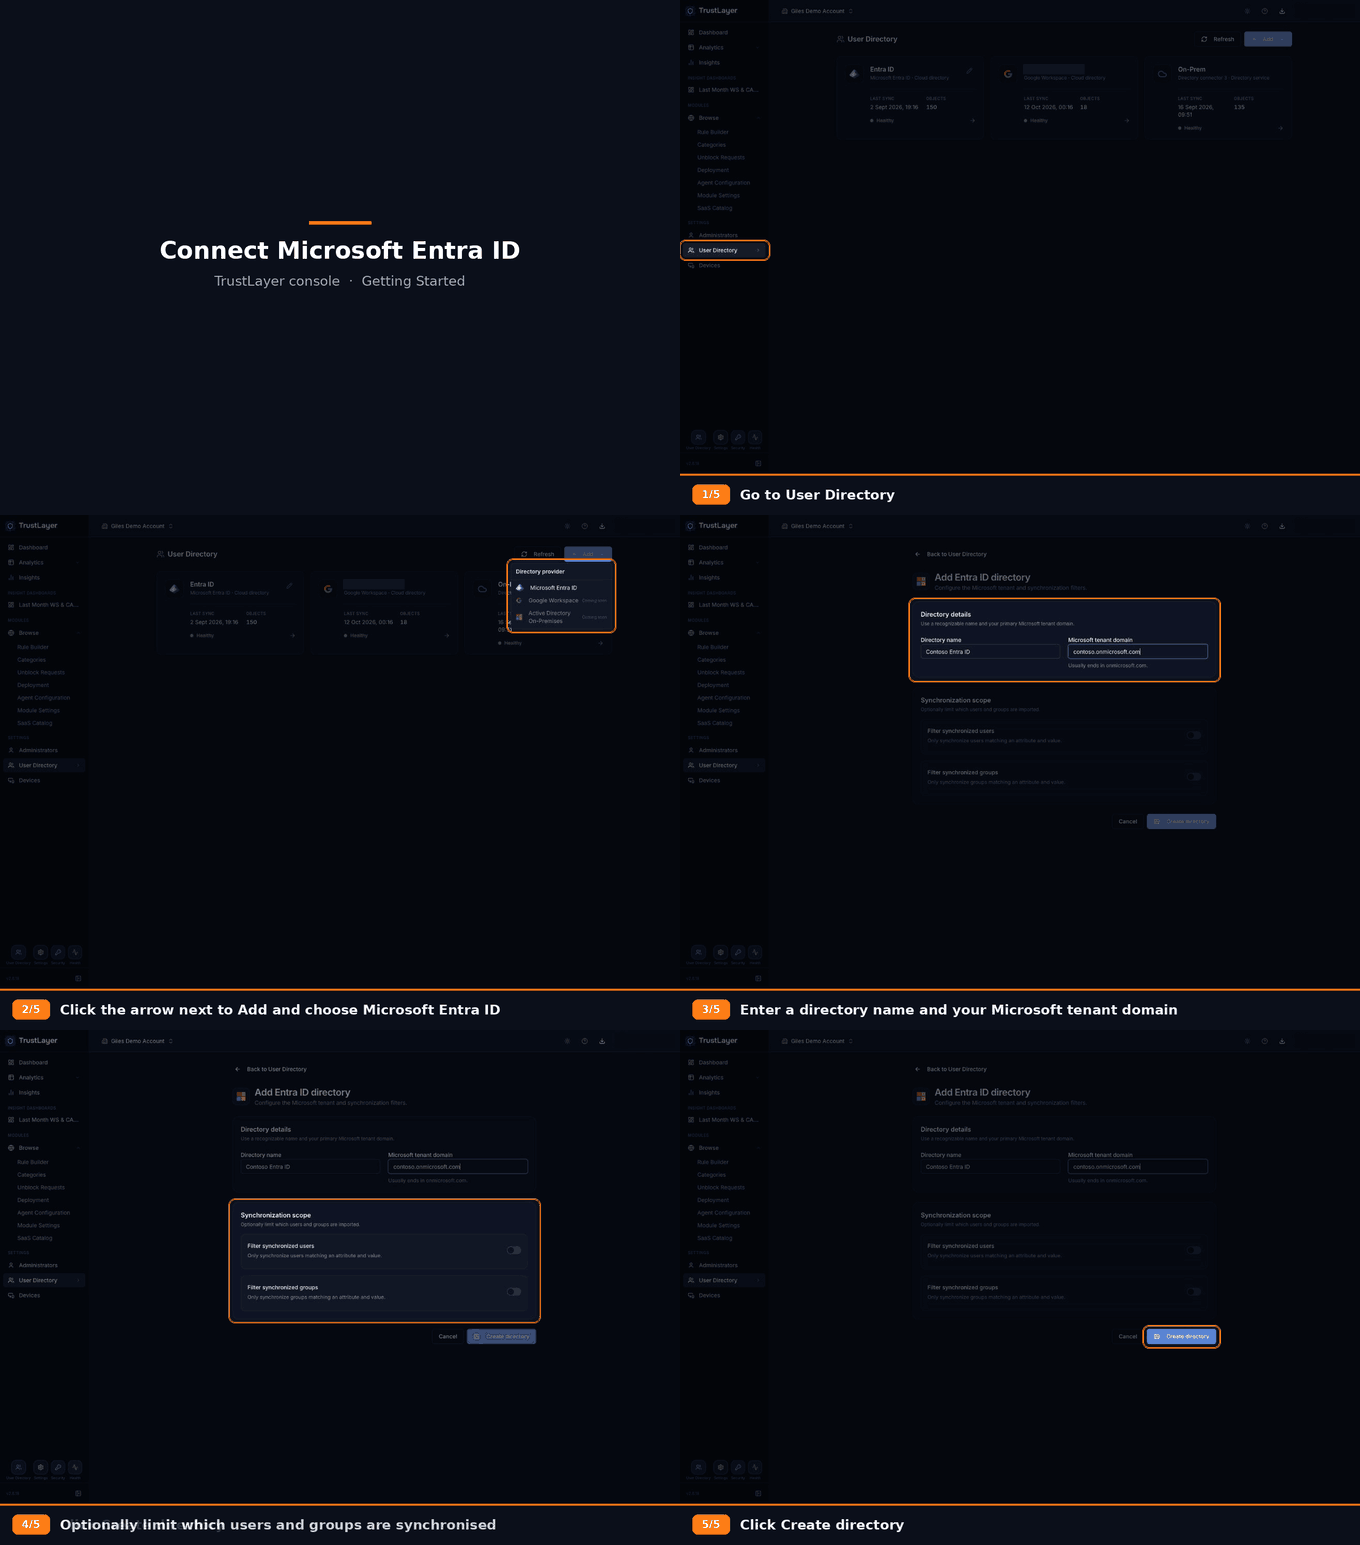
For more information, see User Directory (Active Directory and Entra ID).
3. Set up a Windows agent profile
Setting the right Username Capture Type makes sure your user and group rules are applied: SAM Account Name for on-premise Active Directory, or User Principal Name (UPN) for Entra ID.
- Click Browse ⟶ Agent Configuration and choose the Windows tab.
- Click the profile to open it.
- Open Identification and choose the Username Capture Type.
- Click Apply Changes.
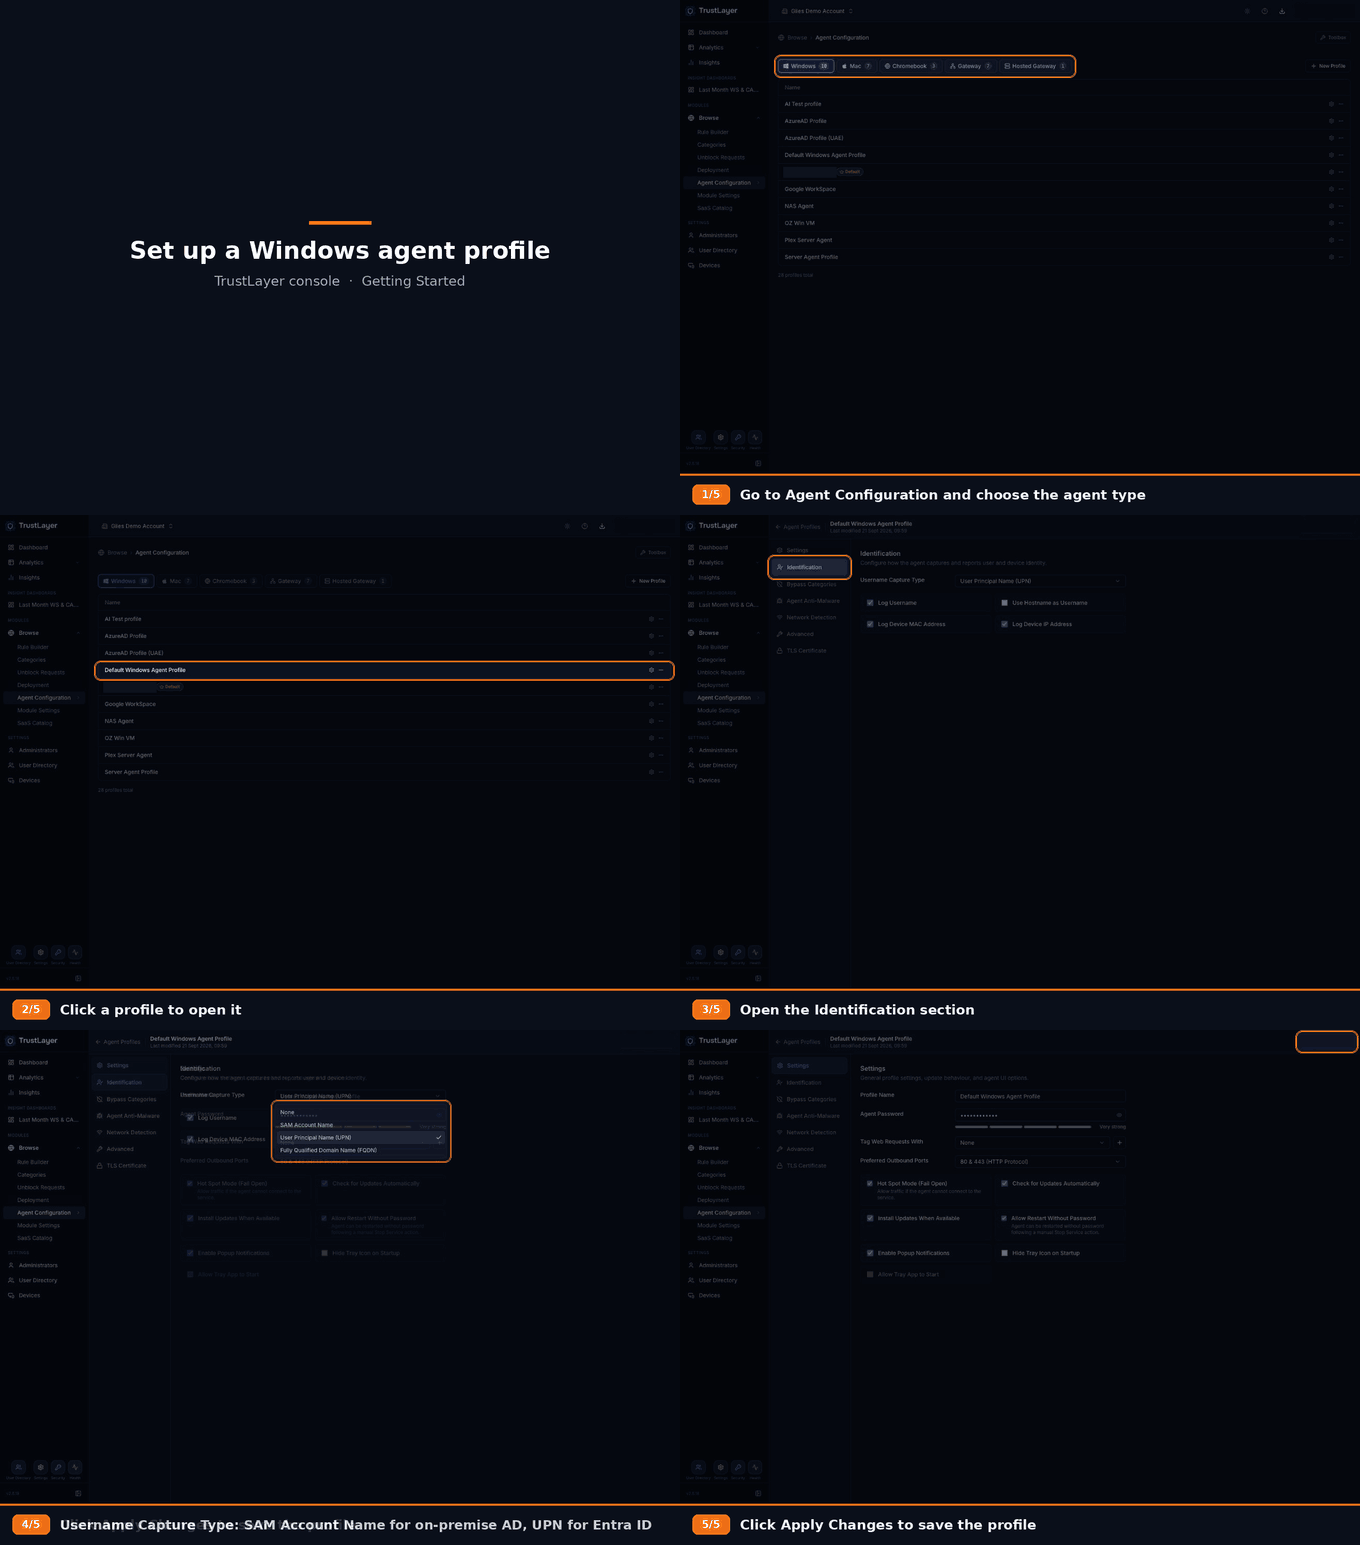
For all profile settings, see Agent Configuration Profiles.
4. Deploy the Windows agent
- Click Browse ⟶ Deployment.
- Click the download button and choose Windows Agent.
- Run the installer on the computer and sign in with your Agent Installer account when asked, to register the agent to your account.
- The agent then appears in the Deployment list.
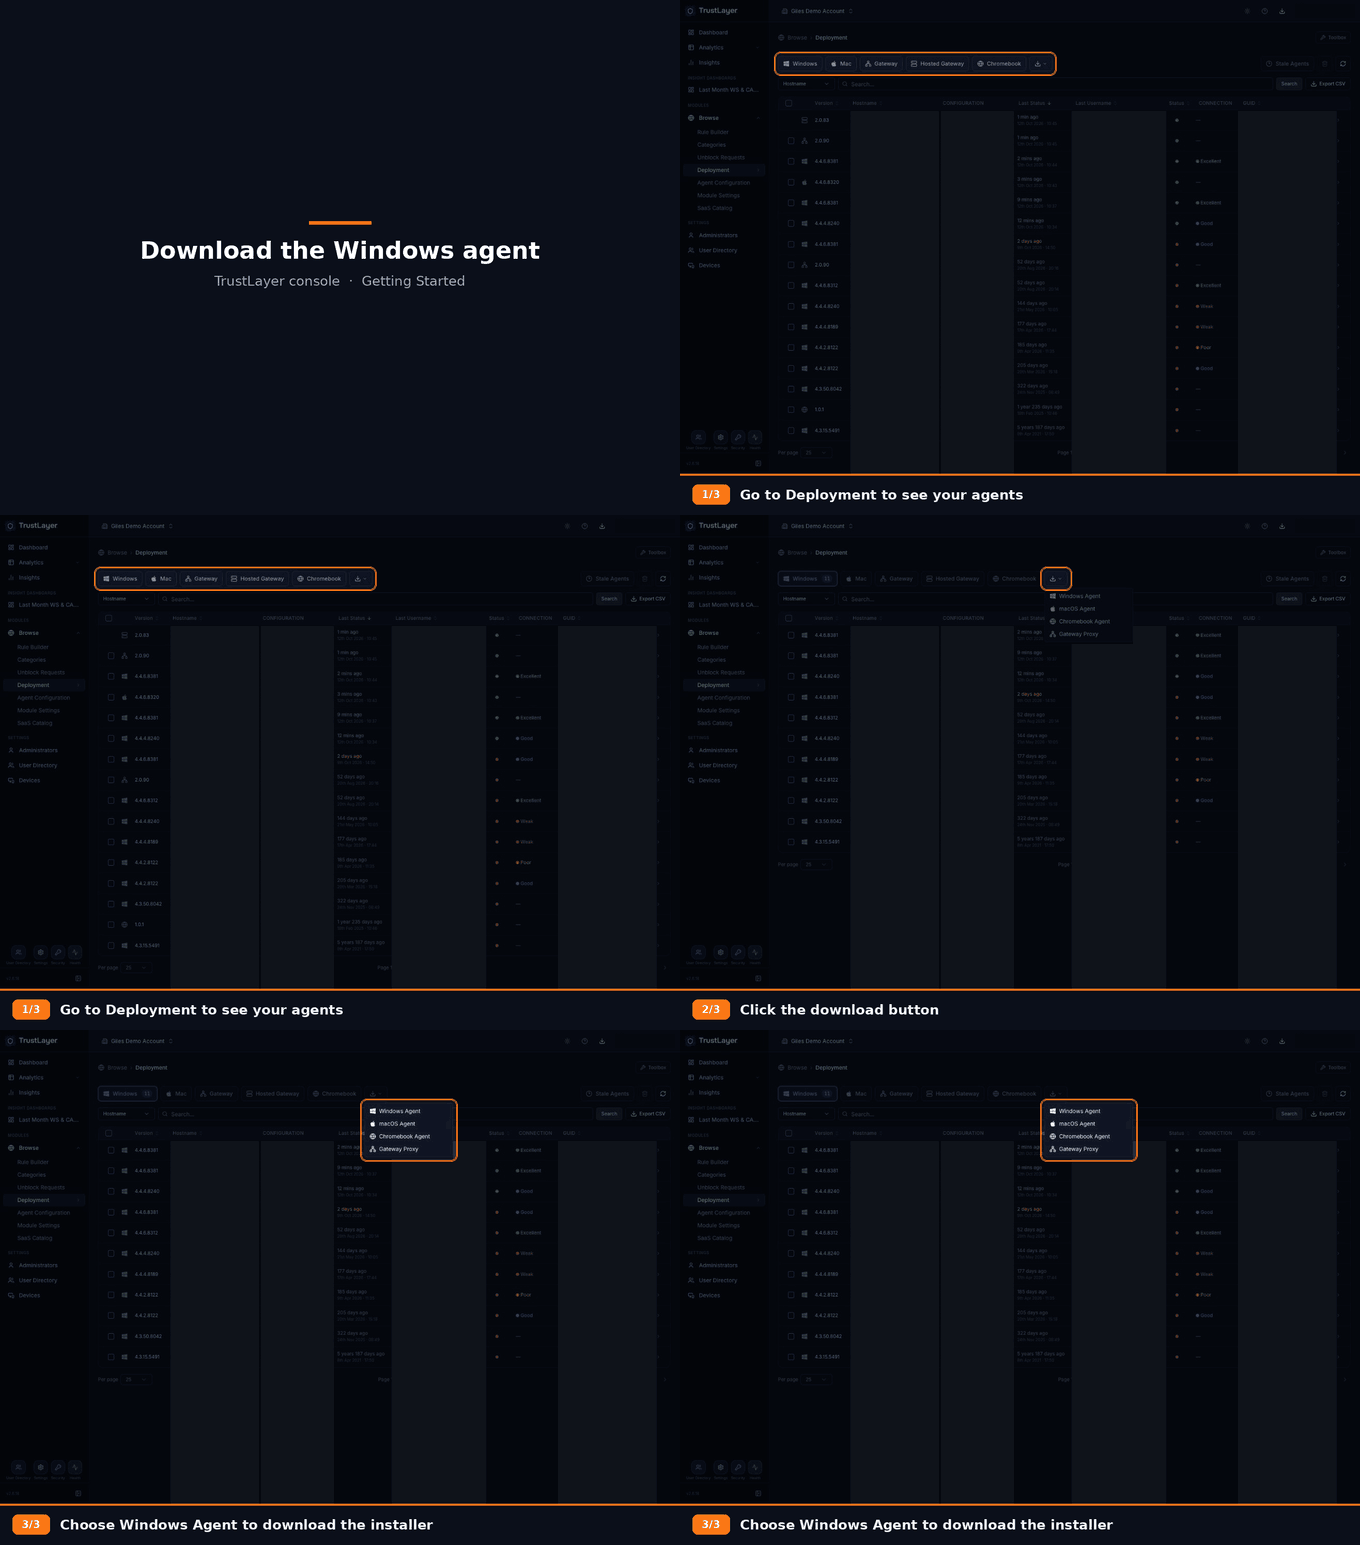
For other deployment methods, such as Intune or Group Policy, see Deployment.
5. Create web security rules
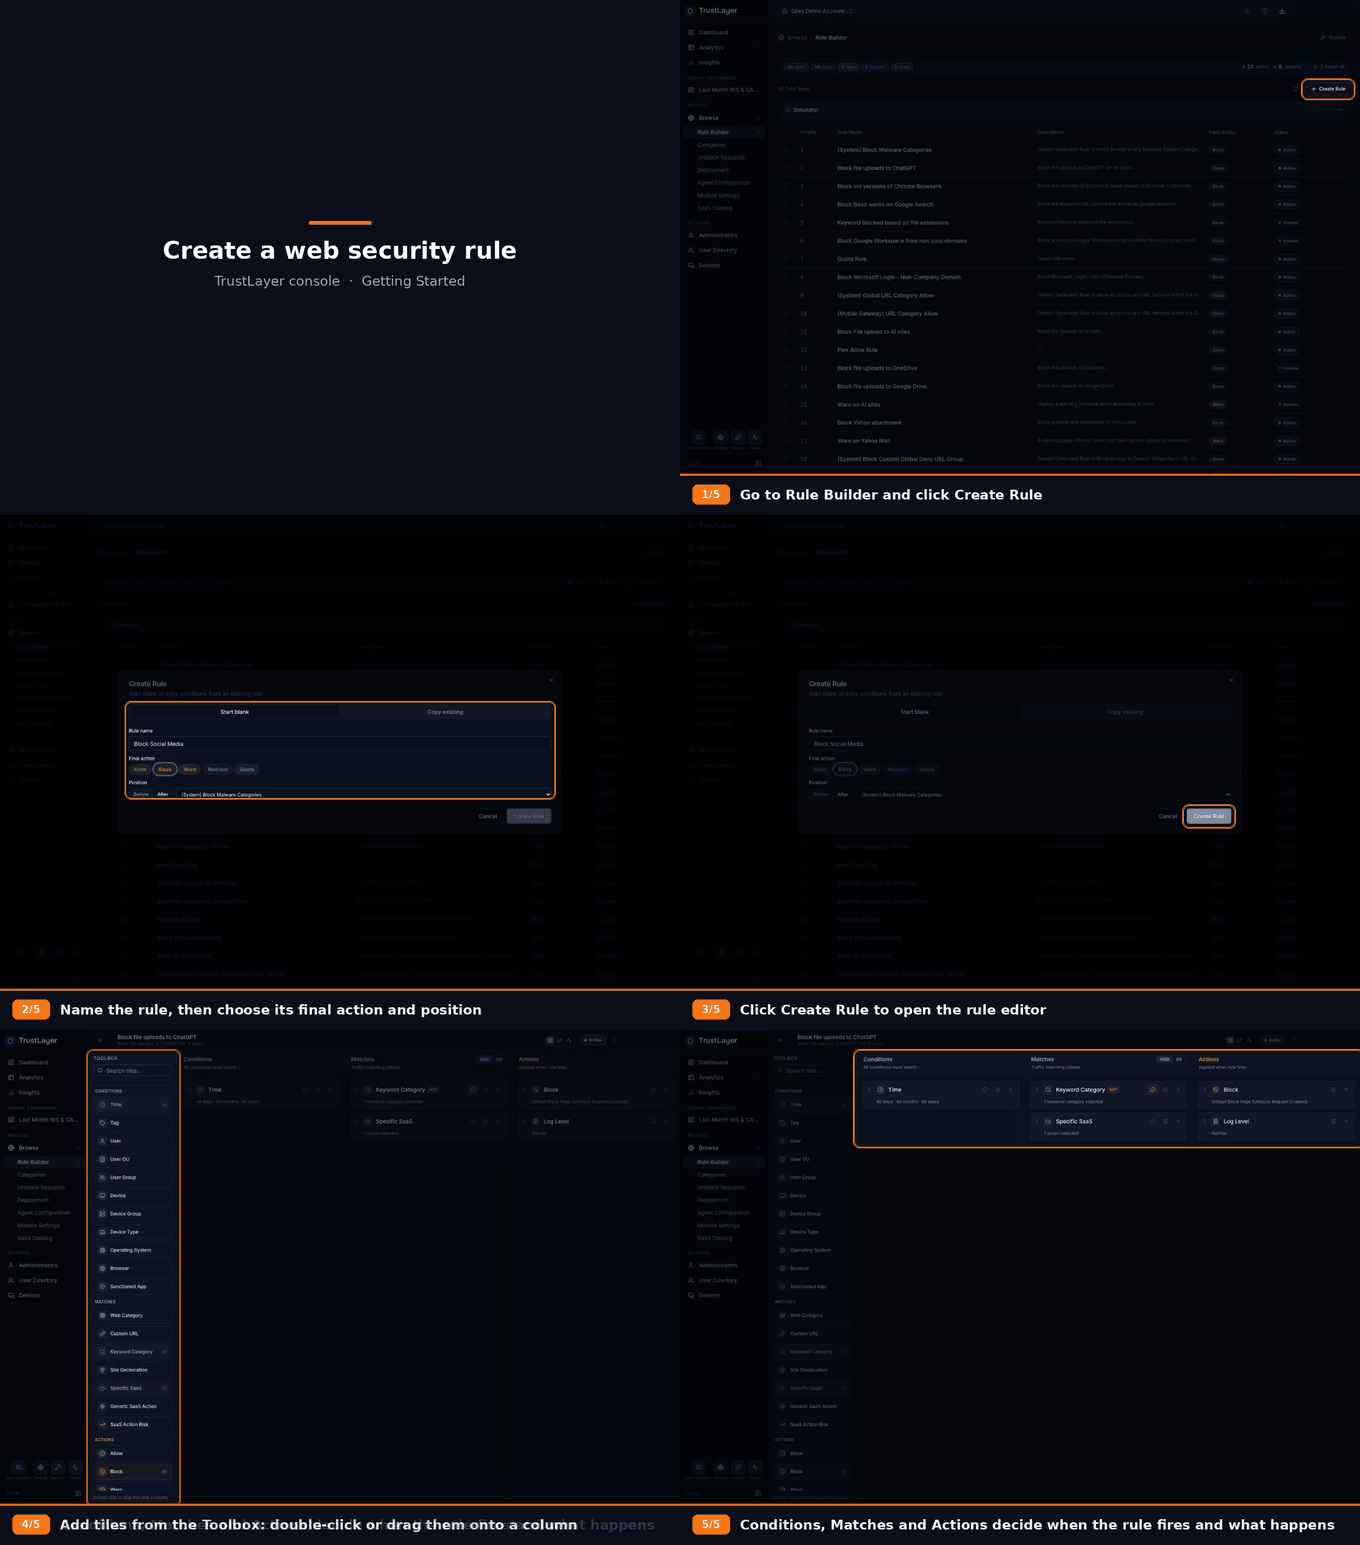
- Click Browse ⟶ Rule Builder and click Create Rule.
- Enter a Rule name, choose the Final action (Allow, Block, Warn, Redirect or Quota) and the rule's Position.
- Click Create Rule. The rule editor opens.
- Add Conditions, Matches and Actions from the Toolbox by double-clicking or dragging the tiles.
For more information, see Rule Builder.
6. Web Security reporting
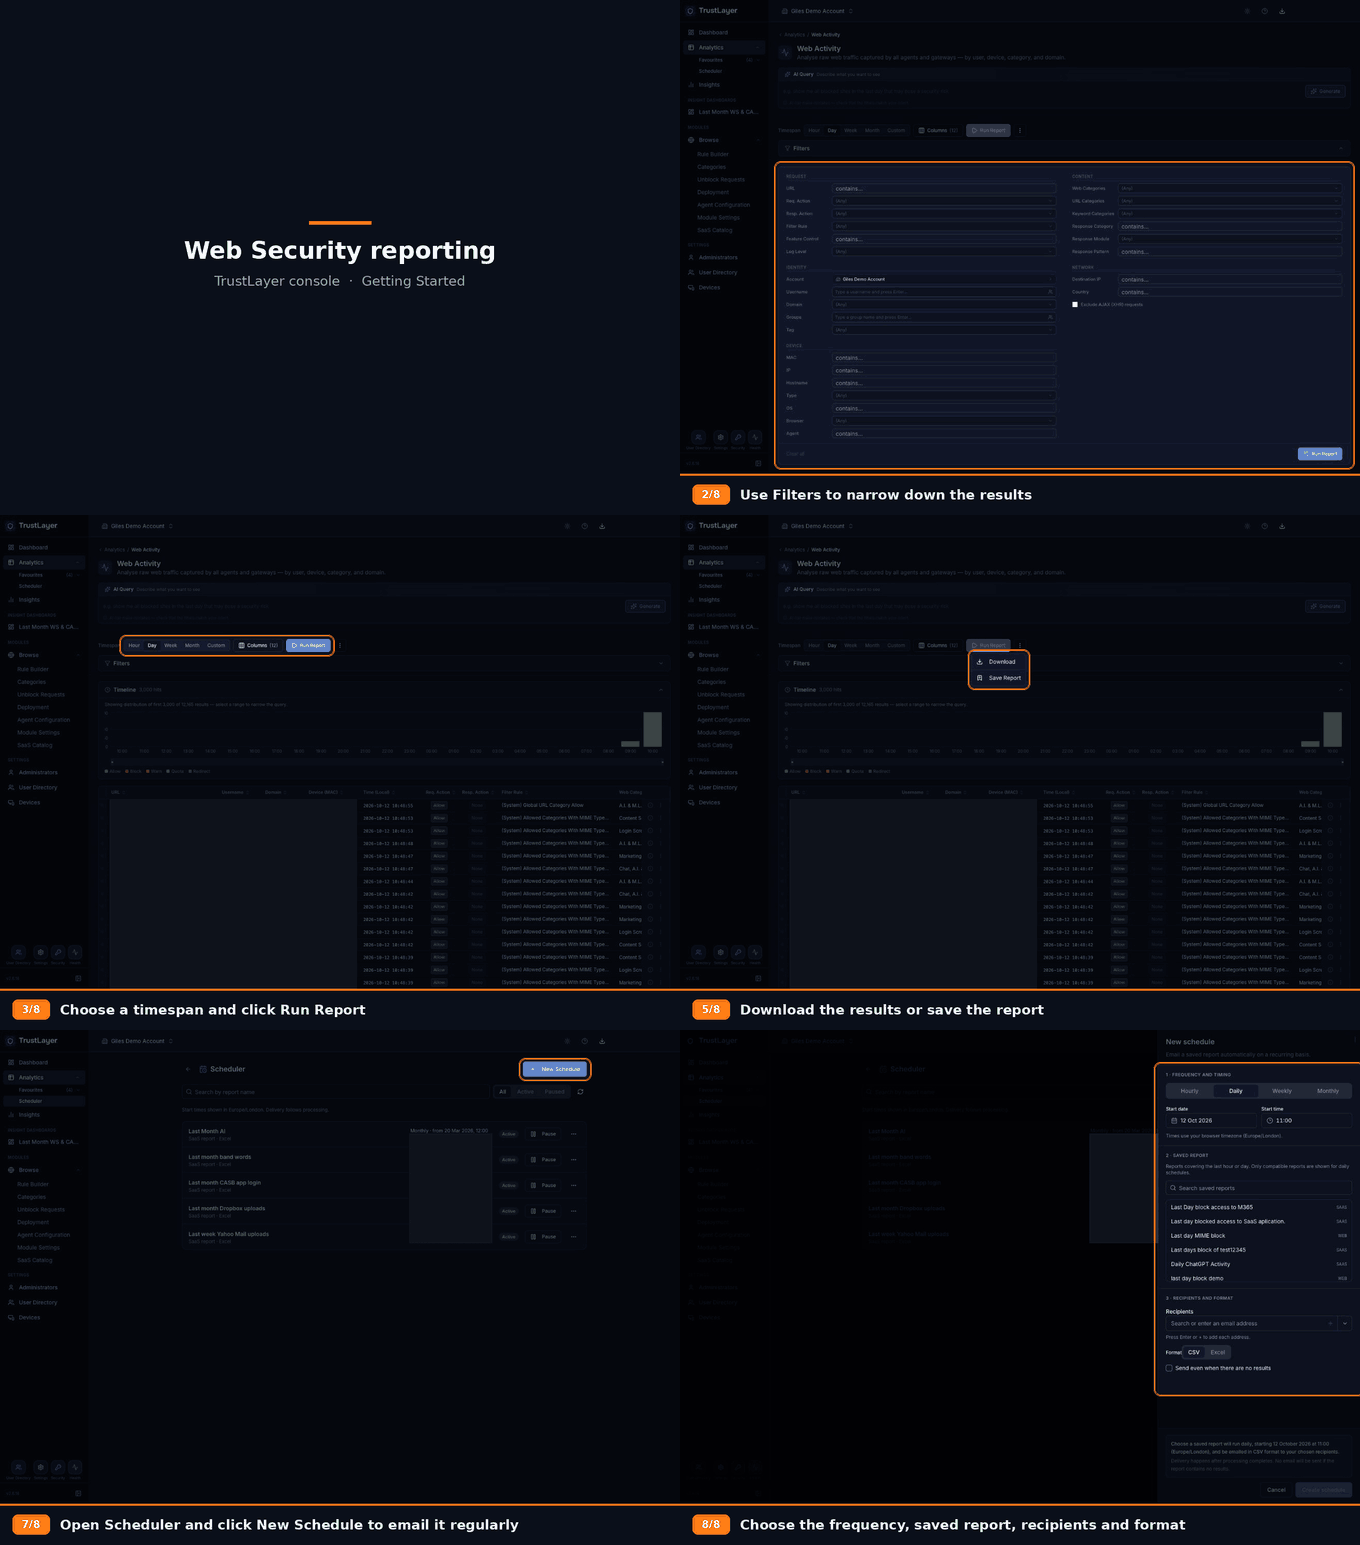
- Click Analytics and open Web Activity.
- Optionally, click Filters to narrow the results.
- Choose a Timespan and click Run Report.
- Use the ⋮ menu to Download the results or Save Report.
- To email a saved report regularly, click Scheduler under Analytics, then New Schedule.
For more information, see Activity Reports and Schedules.
Recommended: enable two-factor authentication
As a best practice, turn on two-factor authentication (2FA) for your administrator account. Keep a separate Agent Installer account without 2FA for registering agents.
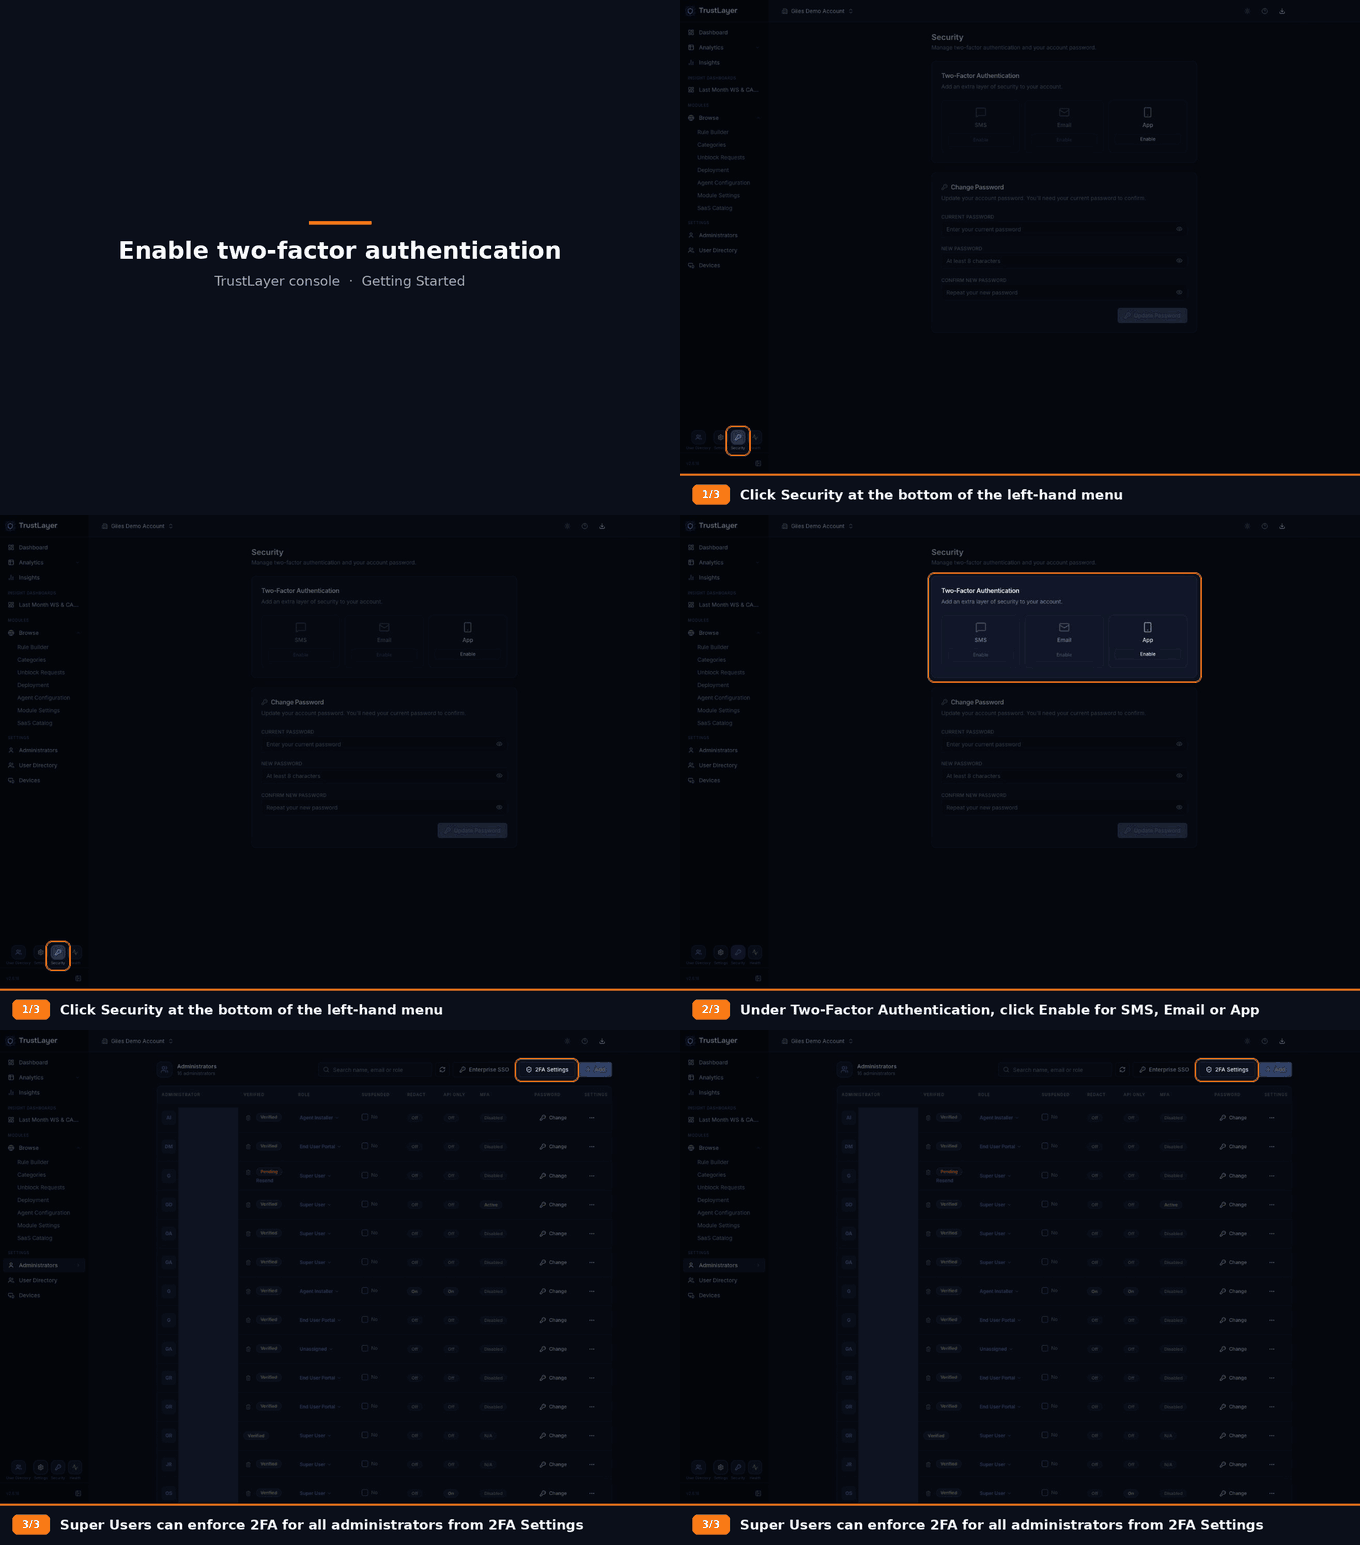
- Click Security at the bottom of the left-hand menu.
- Under Two-Factor Authentication, click Enable for SMS, Email or App and follow the prompts.
- Super Users can require 2FA for all administrators from Administrators ⟶ 2FA Settings.
For more information, see Account Security Guidelines.