Authorised Delete in CEA
Authorised Delete
How to delete entries from the Compliant Email Archive (CEA) using Authorised Delete.
The "Authorised Delete" feature permits users to ask for the removal of an item (like an email) from CEA. However, this is a significant and irreversible action that necessitates the approval of the data guardian before any steps can be taken. If you'd like to learn more about data guardians, you can find additional information at the provided link. To initiate an authorised deletion, please refer to the following article.
Requesting a Deletion
How to request a deletion from CEA.
Although requesting the deletion of an item from CEA is a straightforward process, it is important to note that the deletion must be approved by the Data Guardian of the CEA system before any action can be taken on the request. In the following section, we will provide a guide on how to request a deletion from the archive.
1. Create a Space
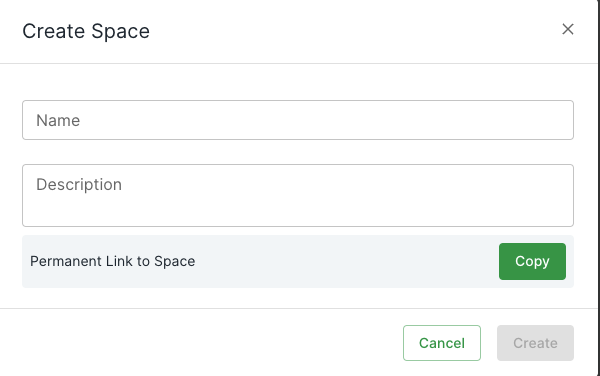
To begin, you must create a "Space" to hold the emails that you want to delete. This area can accommodate a minimum of one or a maximum of hundreds of entries for deletion.
- Go to Spaces
- Click "Create Space"
- Enter your desired name.
- Click "Save"

2. Add Entries to Space
After creating a "Space", the next step is to locate the entries that you wish to delete from the archive using the search interface.
- Find an Entry in the Search Interface.
- Add it to the newly created Space.

3. Request Deletion
After creating a space, adding entries into the space, we now need to request the deletion of these entries. To do this, we need to head back to the spaces page.
- Head to "Spaces"
- Open our newly created Space with our entries in.
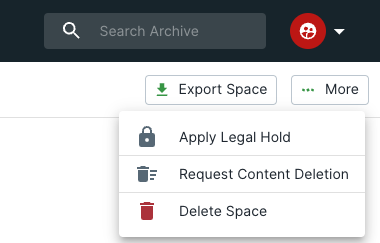
- Click "More"
- Click "Request Content Deletion"
- Choose your choice of entries as well as a request description within the window displayed.
- You can choose to delete the emails from all user's mailboxes as well as your own.
- Click "Confirm Request"
