Configuration options for the USS Chromebook agent - Console
 Updated 3 hours ago
by
admin
Updated 3 hours ago
by
admin
The Agent Configuration page lets you create or modify agent profiles for Chromebook agents.
In the console, go to Browse ⟶ Agent Configuration and open the Chromebook tab. Click the settings (cog) icon next to a profile to open it. The profile editor has a menu on the left with Settings, Bypass Categories, Advanced and TLS Certificate sections. When you have made your changes, click Apply Changes at the top right.
Settings
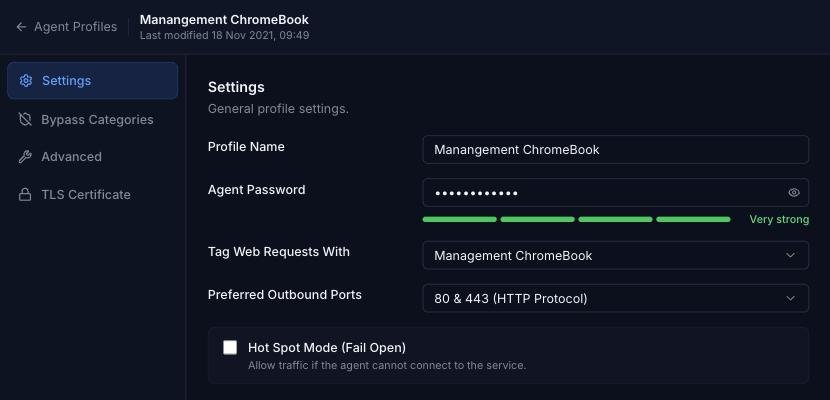
Profile Name
A friendly name for the profile to make it easier to manage. The name is also displayed in the About dialog.
Agent Password
The tamper-proof password which secures the configuration and start/stop options on the agent. This password is automatically generated when the profile is created but can be changed.
Tag Web Requests With
The Tag to assign to this agent. Tags are used to identify the agent in the Rule Builder. Select a tag to use, or choose None if a tag is not required. Tags are managed in Browse ⟶ Module Settings ⟶ Tags.
Preferred Outbound Ports
The agent will connect to the Browse service on ports 1344 & 1345 or 80 & 443. Select the preferred ports here and they will be tried first. If a connection is not established, the agent will try the remaining ports.
Hot Spot Mode (Fail Open)
If enabled, the agent will provide unfiltered access if for any reason the Browse service ports are inaccessible. If not enabled, web access will be blocked until the cloud service becomes available again.
Bypass Categories
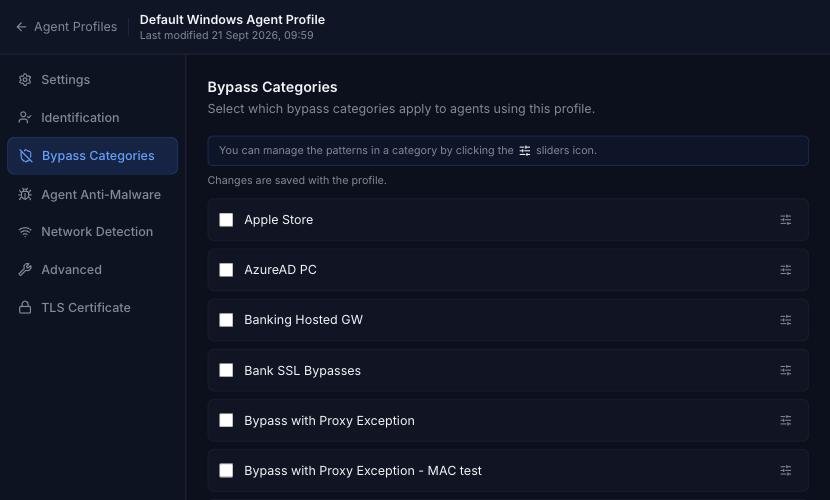
The Bypass Categories section contains a list of available categories, created in Browse ⟶ Categories ⟶ Bypass. Tick the categories to apply to this profile. You can manage the patterns in a category by clicking its sliders icon. Bypass categories provide a way for the agents to trust particular network resources, so that matching traffic does not get filtered by the Browse service. A number of pre-defined categories are provided as a starting point for common services.
Advanced
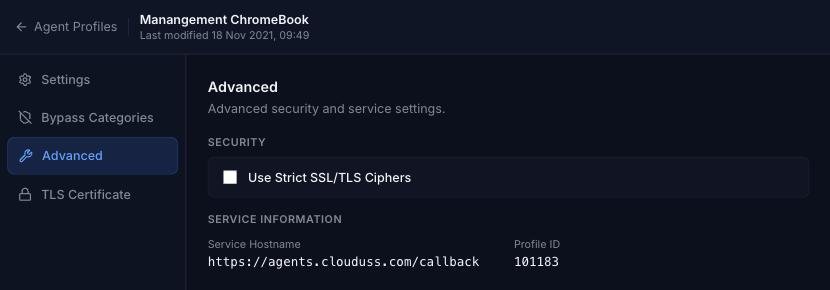
Use Strict SSL/TLS Ciphers
If enabled, the agent will reject connections to Web servers that are configured to use old, deprecated or insecure ciphers (such as rc4 and rc4-md5). This may cause third-party services to stop working. Generally, a web browser will always try and negotiate at the highest possible cipher level supported by the web server.
Service Hostname
Shown under Service Information. The address the Chromebook agent connects to. It cannot be changed.
Profile ID
Shown under Service Information. An internal ID of the agent profile which may be requested by the Service Provider during a troubleshooting session. This ID cannot be changed.
TLS Certificate
In order to perform SSL/TLS Inspection the agent requires a certificate to be deployed to the Chromebook, usually via the Google Admin console. The TLS Certificate section shows the certificate details (subject, issuer and validity dates) and the current certificate. To get the public key to upload to Google Admin, click Copy or Download .pem.
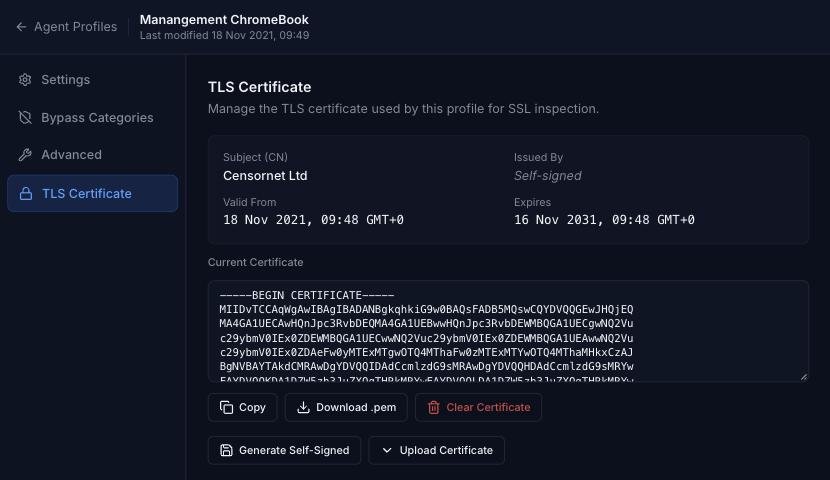
You can also click Generate Self-Signed to create a new certificate, Upload Certificate to paste your own PEM-encoded certificate and private key, or Clear Certificate to remove it. If you change the certificate, you must deploy the new one to your Chromebooks.