Web Security: Best Practice Guide - Console
 Updated 3 hours ago
by
admin
Updated 3 hours ago
by
admin
This guide outlines best practices for Web Security
Block Unclassified Site
Feature:
Block Unclassified Sites by default – By enabling this feature, our solution will block access to sites that the categorisation engine has not classified yet. This could be because the site is very new, or no requests have been made to that site, etc.
To understand more about the Unclassified / Uncategorised proccess, please view this KB article.
Why do we recommend:
To prevent access to sites that are yet to be classified and therefore potentially malicious.
How to configure:
Follow this KB article on how to configure this feature.
Tips:
Rule Prioritisation
Feature:
Rule Prioritisation – By ensuring the correct ordering of rules, you can maintain security. Rules are processed from top to bottom with rules only being triggered if the "conditions" and "matches" within the rule are met. Once a rule is triggered, no further rules are evaluated. If no explicit rules are triggered a built in hidden rule ensures the default action on the web request will be allowed (This behaviour can be reversed through the use of an explicit catch-all block rule)
Why do we recommend:
It is always recommended to have the (System) Block Malware Categories rule as the first rule in the Rule Builder to ensure that URLs within these categories are always blocked. This helps to avoid situations, where URLs that were once safe and have been dynamically reclassified due to malicious content being found, are still blocked.
How to configure:
Please see the screenshot below to configure the recommended "Block Malware Categories" rule under Browse ⟶ Rule Builder.

Tips:
Mime Type Filtering
Feature:
Mime Type Filtering – Restrict Mime Types that can be downloaded from the Web
Why do we recommend:
The download of certain Mime Types increases the potential security risk to an organisation (e.g. executables). Use this feature to ensure a user can only download Mime types that are approved by the organisation.
How to configure:
Restrict what users are allowed to download by making sure that rules with the action Allow also have a Content Scan action. When a MIME category is selected on the Content Scan tile's MIME Types tab, downloading that MIME type is no longer permitted.
Follow this KB article on how to configure this feature.
Tips:
Malware Scanning (License Required)
Feature:
Malware Scanning of content.
Why do we recommend:
By enabling the malware scanning capability within the agent(s), you will improve your environment's security posture by having the ability to scan requested content and blocking access if the contact is deemed malicious.
How to configure:
Follow this KB article on how to configure this feature on the Windows Agent.
Follow this KB article on how to configure this feature on the Mac OSX Agent.
Follow this KB article on how to configure this feature on the Gateway.
Tips:
Internal Bypass
Feature:
Have a Bypass list of internal addresses.
Why do we recommend:
Our solution only knows about public sites and applications. If you host your own site and application on your internal network, then access may be blocked unless you configure a bypass group for the internal address.
How to configure:
Please see the screenshot below to configure the recommended "Internal (System)" bypass under Browse ⟶ Categories ⟶ Bypass.
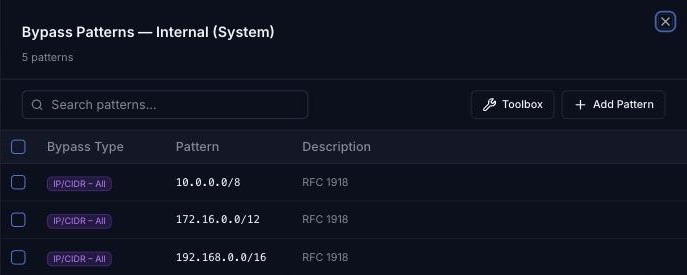
Follow this KB article on how to configure this feature.
Tips:
Browser Categories
Feature:
Browser Categories Rule Condition.
Why do we recommend:
Browser Categories allow admins to create a collection of browsers and version number patterns, which can be used in the Browser condition in the Rule Builder. Browser Categories allow you to control the types of browsers and versions used within your organisation. Typically, this can be used to block vulnerable browsers or unsanctioned browser versions from connecting to the Internet.
How to configure:
Follow this KB article on how to configure this feature.
Tips:
Operation System
Feature:
Operation System Rule Condition.
Why do we recommend:
An Operating System Rule Condition allows admins to create rules to control the types of Operating Systems and versions used within your organisation. Typically, this can be used to block vulnerable Operating Systems or unsanctioned Operation System versions from connecting to the Internet.
How to configure:
Follow this KB article on how to configure this feature.
Tips:
MFA on Admin Account
Feature:
Enabling MFA on any admin account.
Why do we recommend:
By enabling MFA on admin accounts, the authentication process will be improved by adding an extra layer of security via an App Authenticator, Email or SMS based OTP (One Time Passcode).
How to configure:
Follow this KB article on how to configure this feature.
Tips:
Admin Audit License
Feature:
Admin Audit license
Why do we recommend:
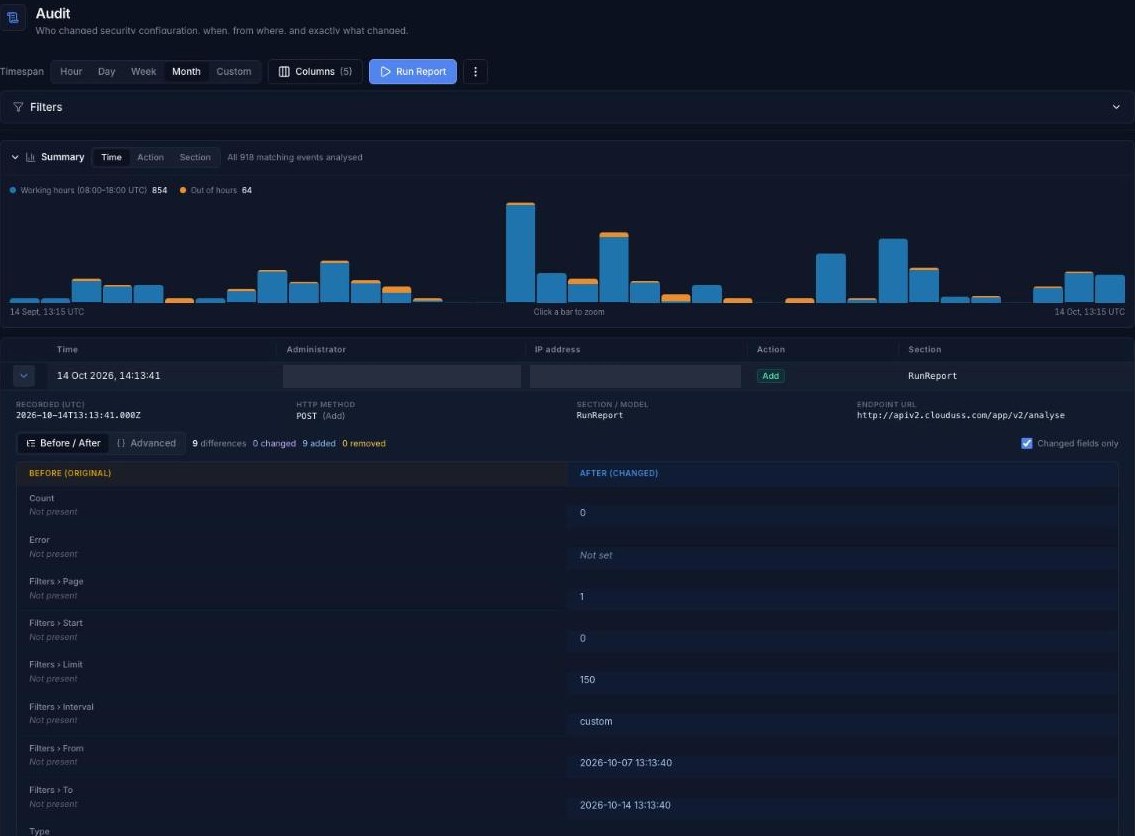
By enabling the admin audit feature, administrators have a high-level history of activity carried out by administrator users within the console.
How to configure:
Follow this KB article to confirm you have the license.
To review administrator activity, go to Analytics ⟶ Audit, choose a timespan and click Run Report. Each row shows when the change was made, which administrator made it, their IP address, the action and the area of the console (Section). Expand a row to compare the configuration Before and After the change.